| First Name: | Edward | Last Name: | DAVIES | |
|---|---|---|---|---|
| Date of Death: | 19/04/1917 | Lived/Born In: | Regent's Park | |
| Rank: | Private | Unit: | London10 | |
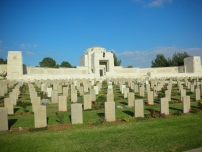
| Memorial Site: | Jerusalem Memorial | |||
Current Information:Age-29 175, Albany Street, Regents Park
After the Western Front, the second largest theatre of war between 1914 and 1918 was Egypt and Palestine. Britain had long had a foothold in Egypt guarding the vitally important Suez Canal and when war was declared against Turkey (the Ottoman Empire) who controlled all of what is now known as the Middle East, British troops were sent to guard the canal from attacks from the north. For the first two years of the war the British forces were on the defensive as the Turks, backed by the Germans, made a number of attempts against the canal but an important victory in August 1916 at Rumani relieved the pressure and the British force was then able to move onto the offensive and advance north into Palestine. By March 1917 they had concentrated at Rafah and were ready to attack the coastal town of Gaza and the fortifications running east from there to Beersheba. The First Battle of Gaza which was launched on 26th March, 1917, failed to break through the Turkish lines despite the numerical advantage of the British. The casualty list was high as well and it was only by down playing the figures that the commanders in Palestine were able to persuade their political masters back in London that another attempt was a feasible proposition. The Second Battle of Gaza began on 17th April, 1917 but unlike in the First Battle the Turks were now much better prepared. Their defences were greatly improved not only around Gaza City but also along the road running east to Beersheba. Unable to outflank the Turks the British army had no alternative but to attack head on but using three divisions this time rather than just two and with the added advantage of eight tanks. But in the end the result was the same as the first battle. The infantry were unable to break through the determined Turkish defence, the tanks proved practically useless in the desert conditions and after three days the battle was called off with the British retiring to their former lines to lick their wounds. The British had suffered over 6,000 casualties, three times as many as the Turks. The first two days of the battle saw the three infantry divisions moving forward. 53rd Division advanced up the coast while 52nd and 54th Divisions took up position from which they could attack the town from the the south and from the ridges in the east. This was accompanied by an artillery bombardment of the Turkish defences which continued through to the next day. The main infantry attack came on 19th April. 54th Division attacked with 163 Brigade on the left and 162 Brigade on the right. 10th London and 4th Northamptonshire led the assault by 162 Brigade which had 11th London following up in support. As they set off it soon became obvious that the bombardment had not silenced the enemy guns and as they moved across open country they met heavy artillery and machine-gun fire. The left half of the 10th London became separated from their right when they came across a non-connected line of trenches, through which they were able to fight their way across the Gaza-Beersheba road, forcing an artillery gun to withdraw. This resulted in the creation of a gap of 800 yards between the two sections of the battalion. To make matters worse they had also advanced out of sight of the 156 Brigade of 52nd Division on their left, which left their flank hopelessly exposed and the advanced group was eventually forced to withdraw back across the road when two Turkish battalions counter-attacked strongly. They were forced back another 600 yards before supporting machine guns in the Wadi Mukaddeme stopped the counter-attack. Meanwhile, the right half of the 10th London had kept touch with the 4th Northamptonshire, which was held up 500 yards from the Turkish trenches. 161 Brigade was brought up from reserve but was equally unable to make progress. The attack had stalled, the Turkish positions remained intact and although there was an attempt to renew the offensive the following day it was soon abandoned and there was a general withdrawal back to their own lines. One of the many casualties sustained by 10th London during the battle was Edward Davies. |
||||
| « Back to Search Results | ||||
| If you think any of the information shown here is incorrect, Click Here to submit your amends and comments | ||||


